MATERIALS
1 sheet of 7-count clear plastic canvas
1 tapestry needle size 18 or 20
1 large plastic tapestry needle or a bodkin
1 skein each of Rachel B 2 Raspberry; B
8 Bright Yellow; B10 Turquoise
ABOUT RACHEL
Rachel is a tubular nylon thread which is
fun and easy to work with. It has a shiny, slick appearance.
It can be stitched flat to give an almost transparent effect
or it can be scrunched up to achieve deep, rich colors. And you
can do all sorts of other neat things with it. Because itís
hollow, you can thread other threads through the center of it.
For this class, weíre going to take
advantage of this feature to create different colors from the
ones we started with. So even though weíre only working
with three primary colors of thread, weíll end up with
a total of six colors!
CAUTION: Once Rachel is stitched, it wears
like iron. While you're working with it, though, it can ravel.
If this happens to you, clip off the raveling end of the thread
as soon as you notice it.If you don't, the entire length of thread
will unravel and you'll end up with a pile of fluff!
HOW TO MAKE THE COLORS
In order to make the thread thick enough
to work with AND to make the new colors, weíll thread
one color of Rachel inside another.
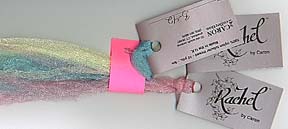
First, prepare all of your skeins of thread.
When you remove the skein from the label, untwist it and cut
the entire skein through the knot. You will now have 10 equal
lengths of thread. To keep them from getting all messed up and
lost, loop each color back onto the label as in the picture here.
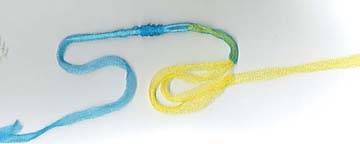
Now take one length of the yellow Rachel
and thread it onto the bodkin or larger tapestry needle. Take
another length of the same color and gently squeeze one end until
you can see it open up. Carefully pass the threaded needle through
the hole youíve opened up. While youíre doing this,
stop every few inches to smooth the outside thread over the inside
one. Continue until the needle starts to come out the other end.
Hold onto the beginning ends of the thread and gently pull the
needle out. A trick I find useful is to knot the far ends of
the two combined threads before I remove the needle from the
other end. Then smooth the entire length of the two threads until
you get everything even. This may take a few tries at first,
but be patient because the results are worth all the effort.
Next, thread the raspberry through a strand
of yellow. Does the new color look like you expect it to look?
Thread the turquoise through a third strand of yellow.
Repeat this with all the colors, so you
end up with a total of six colors.
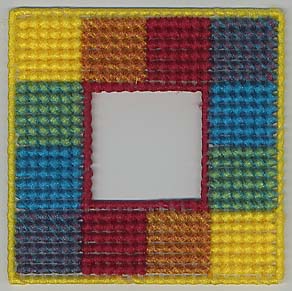
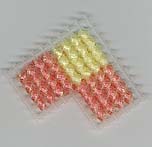
STITCHING THE PICTURE FRAME
The entire design is worked in cross stitch.
If you donít know how to do cross stitch, refer to the
directions in our Tips and Guides section. (Click
here for cross stitching tips) Each color block is
six stitches wide and six rows deep.
- Start in the upper left corner with Yellow.
- Leave one plastic canvas ìthreadî
blank at the top and left side and stitch the first block.
- Next stitch the Raspberry/Yellow to the
right of the yellow block.
- Then stitch the Raspberry.
- After that do the Raspberry/Turquoise.
This completes the top of the picture frame.
- Underneath the Raspberry/Turquoise stitch
the Turquoise.
- Under that stitch the Turquoise/Yellow.
- In the bottom right corner of your picture
frame stitch another Yellow block.
- Repeat the rest of the colors around the
frame.
When you are finished you will have stitched
each color twice.
FINISHING THE PICTURE FRAME
Cut away the excess canvas. If you started
at the upper left corner of the canvas, you will only need to
cut around two sides. BE SURE TO LEAVE A BLANK ROW OF CANVAS
ALL AROUND THE STITCHING!
Carefully cut out the center of the frame
to make room for a picture. BE SURE TO LEAVE ONE PLASTIC CANVAS
THREAD BETWEEN THE STITCHING AND THE CUT OUT AREA!
With your choice of color, do a half cross
stitch all around the outside of the picture frame, covering
up the blank row. Do the same on the inside.
Mount your photograph on the reverse side
of your picture frame. Then cut out a backing from pretty paper
or a piece of felt and glue it to the back of your frame. Attach
a hangar or a piece of cardboard to make a stand.
If you enjoyed making up new colors, try
this again with a totally different selection. To make it even
more fun, make up your own designs, too. We did another picture
frame in pastels below , but there are dozens of other possibilities
since Rachel comes in 46 different colors. Itís amazing
to see what happens when you put them together. Sometimes two
colors which look atrocious side by side create a magical new
color when theyíre combined. See what you can discover
and create!