For the convenience of our visitors we have created a 2 page PDF will all instructions and diagrams that can easily be printed out. 
MATERIALS
Threads: (one skein each)
• Rachel (we used B3, Red).
* Rachel, B1, Black.
• Watercolours (we used 186, Papaya).
One skein of each thread is enough to complete all three versions of the design.
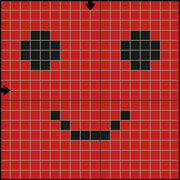
Canvas and Needle: design size is 18 x 18 stitches
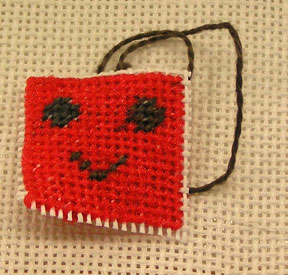
Small size: 18 count canvas about 3" square (design is 1" square)
#22 tapestry needle
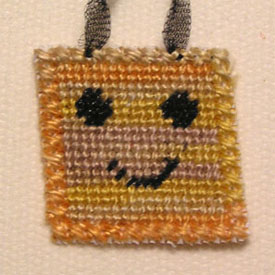
Medium size: 13 count canvas about 4: square (design is app 1.5" square)
#20 tapestry needle
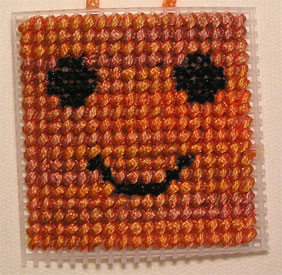
Large size: 7 count plastic canvas about 6" square (design is 2.75" square)
plastic tapestry needle with large eye
Optional: felt backing and thin piece of cardboard
Stitching Directions:
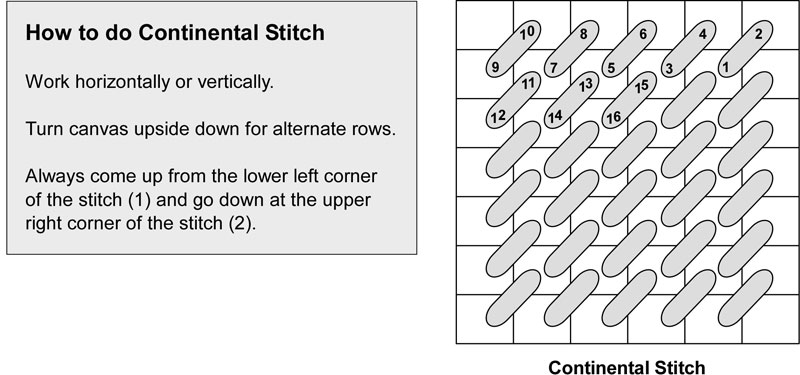
1) Follow the chart and stitch the entire design in Continental stitch (see diagram), placing the colors as indicated -- or choose your own colors.
To stitch the smallest version, use 1 strand of Rachel for the eyes and mouth. Use Watercolours for the remainder of the design. Separate the three plies in the strand and use only one ply in your needle.
To stitch the medium version, use 1 strand of Rachel for the entire design. If you wish to use Watercolours, separate the three plies in the strand and use two plies in your needle.
To stitch the large version, use one strand of Rachel for the eyes and mouth, but work cross stitches instead of needlepoint (Continental) stitches so the thread will cover the canvas. To make the special thread for the background, thread one complete strand of Watercolours through the center of the Rachel. You can use your tapestry needle to do this.
2) Add a hangar with leftover thread if desired.
3) On the small and medium sizes, work one row of cross stitch over two threads around the entire design. This will help to prevent your design from raveling when you cut it out.
3) Cut out the stitched design, leaving one canvas thread exposed all around. Cut a square of felt the same size of the design and glue it to the back. For extra rigidity, you can cut a piece of thin cardboard and glue it to the back of your design before you add the felt.